Tuesday 18 December 2012

Petal Essence

Another new series! There's a lot more work in this than you might think - making the petals is quite time - consuming and also uses a fair bit of glass.
I think the result is worth it!

900mm x 600mm
Yes I know this mirror is sideways, but it's to illustrate that a lot of my mirrors can be hung either vertically or horizontally.
I can imagine this mirror at a wedding venue - the bride giving herself a final check before she walks down the aisle. It'd make a great photo to see her reflected in here, the white lacy design and the petals complimenting her dress!


A close-up of the mirror. You can see the iridising on the border and the swirls. Looks spectacular in the flesh.


                                                         Looks effective on a Lazy Susan too.


900mm x 600mm
Similar design to the white mirror, it can also be hung either way. The black grout accentuates the design I think.


                                                                600mm x 600mm


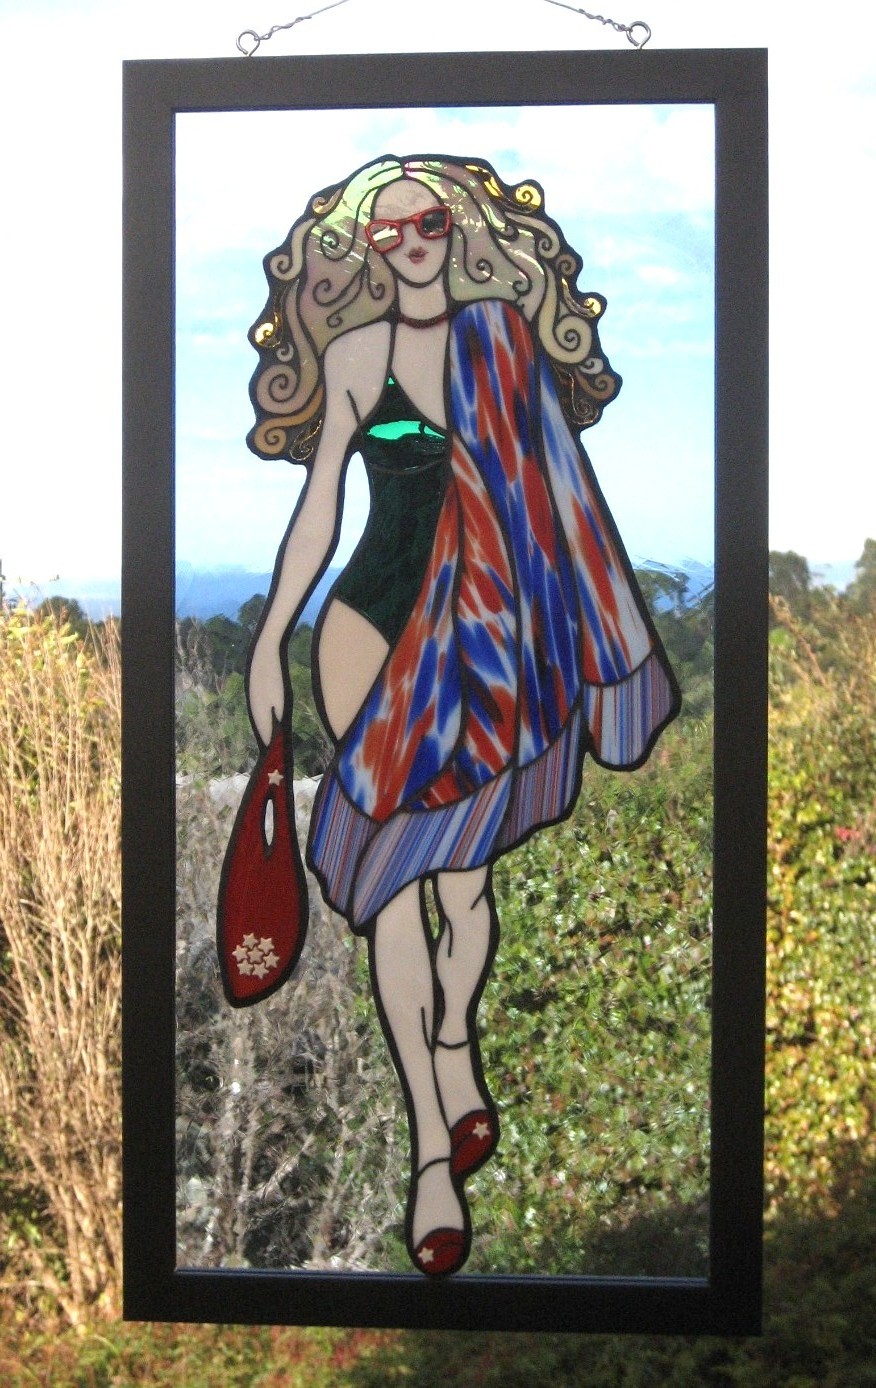
And now for something (not) completely different:

                                                               600mm x 600mm
Despite my best efforts this photo refuses to download in the upright position. Computers can be such jolly good fun sometimes.
Anyhow, using the bluish coloured glass of many hues puts a new slant on the design!

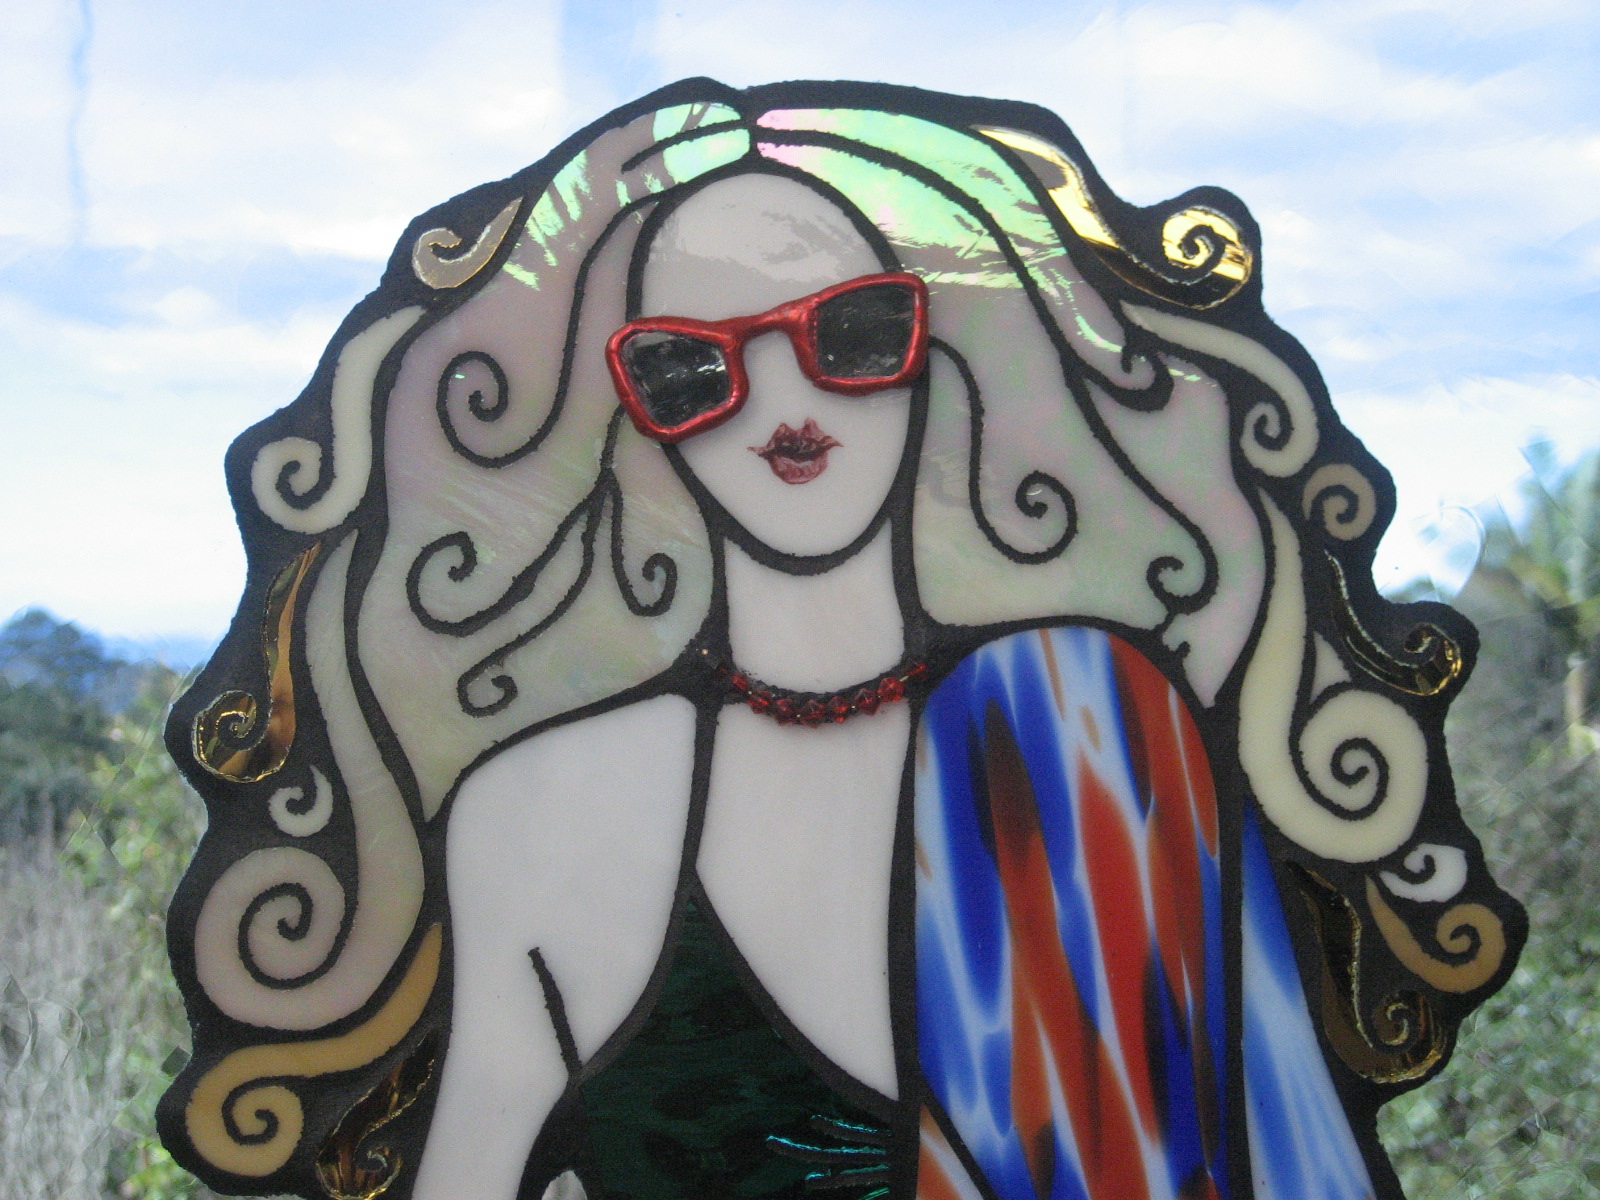
Detail of the above:

                                                                      Beautiful.


I know you're all breathlessly awaiting my next post, so hang in there (pun)!


Saturday 17 November 2012

Art Deco Style

I've been wanting to do something Frank Lloyd Wright - ish for a while, so I've made a couple of mirrors in Art Deco style. They're all 900mm x 600mm on the water resistant substrate, so you could display them outdoors.

Again they're impossible to photograph adequately, so I took them inside, put them on a stool, and used the ceiling as background.

Hers's an outdoor photo:

                                               The reflections are confusing to say the least!


Here's the same piece with the ceiling as background:

                                  Looks a bit flat and lifeless, but at least you can see the design.

Anyhow, here's another mirror - the rounded geometry caused me some headaches but the end result is pretty good I reckon:


And lucky last in this series:


You can see tantalizing hints of the different highlights and reflectivity even in these crappy photos. Just have to see them in the flesh at the galleries (or at home after you've bought one!)

Thursday 26 July 2012

AGOG over GOG GIRL!

My Glass Girls Series has just grown by two. They're twins - one is stained glass mosaic, the other is Glass-on-Glass. I call them Sandy and Shelley.
GOG Sandy

The GOG technique is a jealously guarded one that has been handed down through hundreds of generations of a mystical Nepalese tribe and only available to outsiders who complete a rigorous training regime lasting at least fifteen years.

Or you can use Mac Glue.


Sandy being a shadow of herself. You can see the texture of the background glass in the shadow.


                                                        This highlights her golden tresses!


                                                                      Beach Babe!


                                                                And here's Shelley:
                                                                      

                 Her swimsuit is mirrored glass and she's chosen a glass bead necklace to accessorise.
                                                            And those sunnies!


What girl wouldn't want a Millefiori handbag?


                                                             With matching shoes!


Wednesday 11 July 2012

Queensland Garden Expo

We've decided to start attending "Event" markets rather than a weekly one, so for our first one we set up a display at the Queensland Garden Expo last weekend (6/7/8 July) at the Nambour Showgrounds. The Expo is the biggest garden/outdoor show in Queensland and we wanted to promote the business, our classes and hopefully sell some pieces.

Overall it was very successful. We talked and gave brochures to hundreds of people who would never otherwise have seen our work, and sold several pieces as well. The highlights for us of course were seeing all our friends who came to visit and to catch up with people we hadn't seen for ages! Hi to you all and thank you so much for making the 3 days even more fun!

It's a great Expo, and although we didn't get a chance to see it all, we did manage to sample a few of the culinary delights on offer..........mmmmm donuts........ It was also really nice to meet the stallholders on either side of us - Hi Lisa and Lee! If we do the Expo again next year I hope we get you both as neighbours again!

The weather was generally fine, but as a thank - you to all the stallholders the heavens opened right on closing time of the last day, causing great merriment to everyone as they packed up their newly soaked displays.

Some photos:


As you can see, there were times the stall was so busy Mark got squeezed out like a watermelon pip!

Saturday 23 June 2012

Latest Piece

This is my latest piece - a 900mm x 600mm mirror utilising several different elements to create the flowing silver cascade effect:


Here are some photos of the detail:


The stars are made from diamond bevels. I apply Brightback to really make them pop.


Using Brightback again. It gives amazing life to any textured glass.
I still haven't decided on a name for this piece yet - watch this space!

More Budding Mosaicists!

I taught my Beginner's Class to another lovely group of people yesterday! Here they are with their completed projects:


It was a cold, bleak day outside but the creative energies kept it nice and warm inside the studio (and the fire going in the house helped too!). Thank you to everyone for coming, and I hope you all enjoyed the day as much as I did teaching and getting to know you.

Sunday 10 June 2012

Nambour Garden Expo coming up!

It's only another 3 weeks until we have our stall at the Queensland Garden Expo at Nambour. Billed as the premier sub - tropical garden event in Queensland, it attracts huge crowds over the 3 days of 6, 7 & 8 July.
We have decided that rather than commit to a regular weekly market, we'll attend what we call "Event" Markets such as this one. Last week I sent some photos to be included in an advert we are placing in the Official Guide for the event. The Guide will be included in the Wednesday July 6th. edition of the Sunshine Coast Daily and also given out to market attendees.
Here are some of the photos:


 This panel is called "Palm Beach". I'm currently working on a similar piece for a Comission.


 This is a Lazy Susan called "Crystal Elements"


                                                 Another Lazy Susan called "Flutterbys"

Monday 28 May 2012

MAANZ Polymer Clay Day

We had a wonderful day yesterday in my Studio - I held a Polymer Clay Workshop for MAANZ members. 7 girls and one guy (Hi JIM!) attended and I think I've set a lot of them on the path to becoming Poly People!
Barbara, David and Tammy also came to lend support to Mark in the kitchen, and he showed them the dark art of installing hangers in Marmox board while my workshop was running.
The day ended up raising over $400 for MANNZ, which will go towards the cost of our exhibitions etc.
All in all a truly fantastic day, and just reinforces to me and Mark what an exceptionally talented and sharing group we have; we're privileged to know you all!
On to Barbara and David's place next time for David's photography workshop. It'll be a beauty!

Sunday 20 May 2012

Studio News

Here's the newest piece to emerge from the Studio.

It's a full - size (1250mm x 600mm) Argentum Curves Mirror which hangs longways.

It's a commission for a local client who's buying it as a wedding present for herself!


It's been photographed as best I can, but you can't take a photo of a mirror from front - on 'cause guess who you see in the mirror! At least I can crop those handsome heads off the top!

Tuesday 1 May 2012

More Budding Mosaicists

Here's a shot of the latest happy Glass Mosaic Class graduates with the creations they made on the day.

There's still room in the may 12th. Class, so if you want to take that first step to making your own Mosaic masterpiecses, book now: (07) 5499 9502 or glenmark@internode.on.net.

Tuesday 17 April 2012

Smashing Idea

OK, so you take a full sheet of tempered glass, hit it with a hammer (under strictly controlled conditions and very safely) and firstly you get a central area of intensely cracked glass as used on the Lazy Susan.

The rest of the sheet cracks in many fascinating ways and can be used any way you can think of, as in the Dragonfly.

As far as how to keep it all together and getting the colours into it, I could tell you but then I'll have to kill you.........

Might offer a class on it one day!

Having a Smashing Time

Check out these photos - I'll tell you a bit more about them soon........

Lazy Susan


Lazy Susan Detail

Dragonfly


Dragonfly Detail


Monday 16 April 2012

Thanks David & Barbara!

We spent a very enjoyable day at David & Barbara Humphreys' house last Sunday (15th.) attending David's Glass Cutting Class. I learned some new things and I've been cutting glass for over 20 years!

It was lovely to meet everyone (thanks Carol, Tammy and Loren for being my first three Blog followers!), the food was epic and that night we had a lovely Thai meal with David, Barb, and Tammy - thanks David for treating us!!. We stayed overnight at David and Barb's place (5 - star) to just cap the great time we had.

MAANZ is the best Association in the known universe!!

Wednesday 14 March 2012

Framing

Mark has been delving into the mysterious art of framing. It seems there's a pitfall waiting at every possible stage of the process, but after a few practice efforts which will only ever see the inside of the rubbish bin, some quite acceptable frames are appearing on many of my pieces:


I think the frames add a new level of professionalism to the work and we'll be experimenting with different types of frame. I've also found a dual - level frame which I can use to create a true 3 -D piece - watch this space!

Glass Girls

It’s all about the hair! With a very limited palette of coloured glass to work with, particularly in skin tones, I decided that photo – realistic portraits were not my “thing”.
I have developed my own stylised designs, and made each girl’s hair the most striking element of the piece. My first two (“Amber” and “Beatrice”) were so much fun to create I’ve decided to make them Number 1 and 2 in a series with each piece named for a letter of the alphabet.


  Amber


                                                                          Beatrice


 “Celeste” is next!
Each girl in the series will be unique in shape, size and colouring.

Headland to Hinterland

A stylised representation of the vista from Caloundra to the Glasshouse Mountains:


                                       Size is 1200 x 600mm and the substrate is fibre cement board.

 It has been framed using a resin based material which is moisture resistant, so the piece may be displayed in a protected outdoor setting.

Tuesday 13 March 2012

Magic Carpet Series

I love the challenges involved in producing this series.


                                                900 x 600mm, rendered foamboard substrate.


                                               900 x 600mm, rendered foamboard substrate


Creating this series gives me the opprttunity to use many different techniques and skills:
  • Cutting skills - I use my Taurus Ring  Saw to make some of the intricate internal cuts and spirals
  •  Reverse Painting - I paint an image or design on the reverse side of the glass
  • Gold and Silver leaf applied to the reverse side
  • Millefiore - tiny glass rounds in an infinite variety of patterns
  • Bevels, Glass Nuggets and Crystals
  • Photos under glass - can be included to personalise the piece
  • Plus all the ones I haven't thought of yet!
Some examples of these:


                                                         Reverse Painted Bevel


                                                                    Intricate Cut


                                                           Gold and Silver Leaf


                                                       Millefiori as Flower centre


Arriving at a pleasing balance of not only the colours but also the textures and shapes sometimes proves very challenging, but the piece always ends up telling me which way it wants to develop!

Each is an original. I don't think I could produce two the same even if I wanted to!

Magic Carpet pieces are three sizes (in millimetres):
  1. 1200 x 600
  2. 900 x 600
  3. 600 x 600

                                                      600 x 600mm, MDF substrate


The substrate for the smallest one is MDF and the others are on rendered foamboard with an aluminium frame. The latter can be displayed in a protected outdoor situation.


Thursday 2 February 2012

MAANZ 2012

Well here we are already into February. Less than 11 months to Christmas!

I thought I'd share that we have had our Mosaic Association of Australia and New Zealand (MAANZ) planning meeting for 2012 and it's going to be a very exciting and educational year.

We're very happy to be MAANZ members -  they are a very interesting and talented bunch! We really look forward to and enjoy our time together, always learning something new and cementing (grouting?) firm friendships.